TuringSign Site Seal

Provide confidence to your users that your website is secure and trusted

A mark of digital trust and identity

Display the TuringSign Site Seal proudly on your website to show that your site is legitimate and secure. It is the best visual indicator to inform your users that all personal information, transactions and purchases are fully encrypted and protected.

Improve user engagement and increase conversions

Research has shown that by displaying visible site seals, they help to boost user confidence, which in turn improves visitors’ engagement and conversion rate.

Strengthen brand trustworthiness and credibility

Affix a trust icon on your website to maximize the trust of your users that your website is safe and secure. Build brand awareness and establish credibility of your website, while appealing to prospective customers and new business opportunities.

Text logo.
Icon logo.
svg lines

Access your TuringSign Site Seal in 3 simple steps

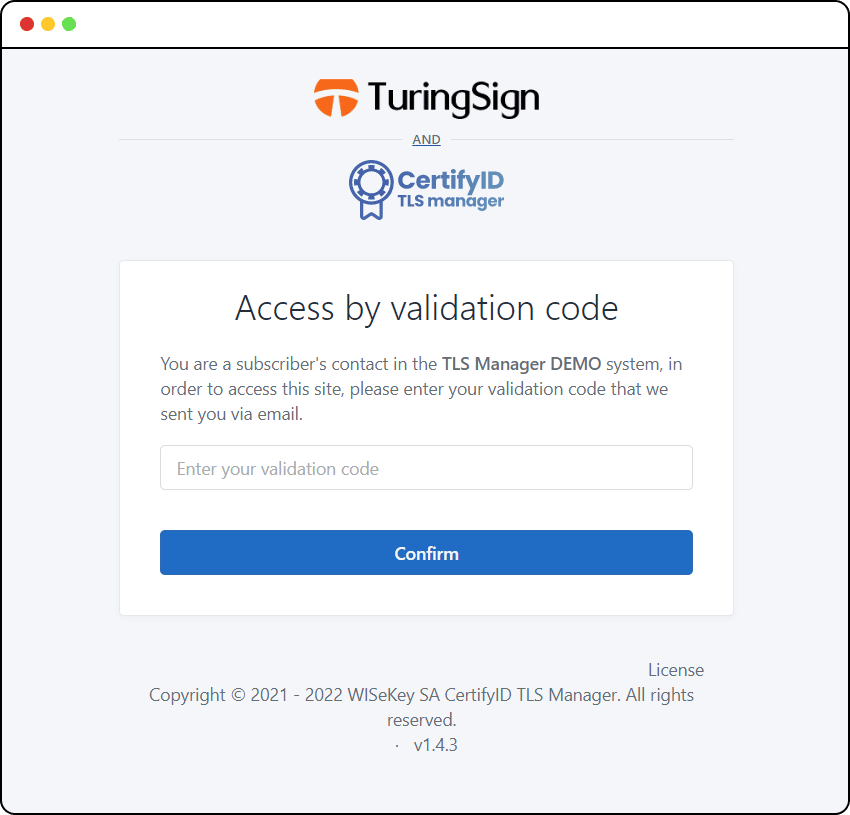
Step 1: Click on the link at order acknowledgment email to access your order in CertifyID TLS Manager.

Enter the provided validation code.

Step 1.

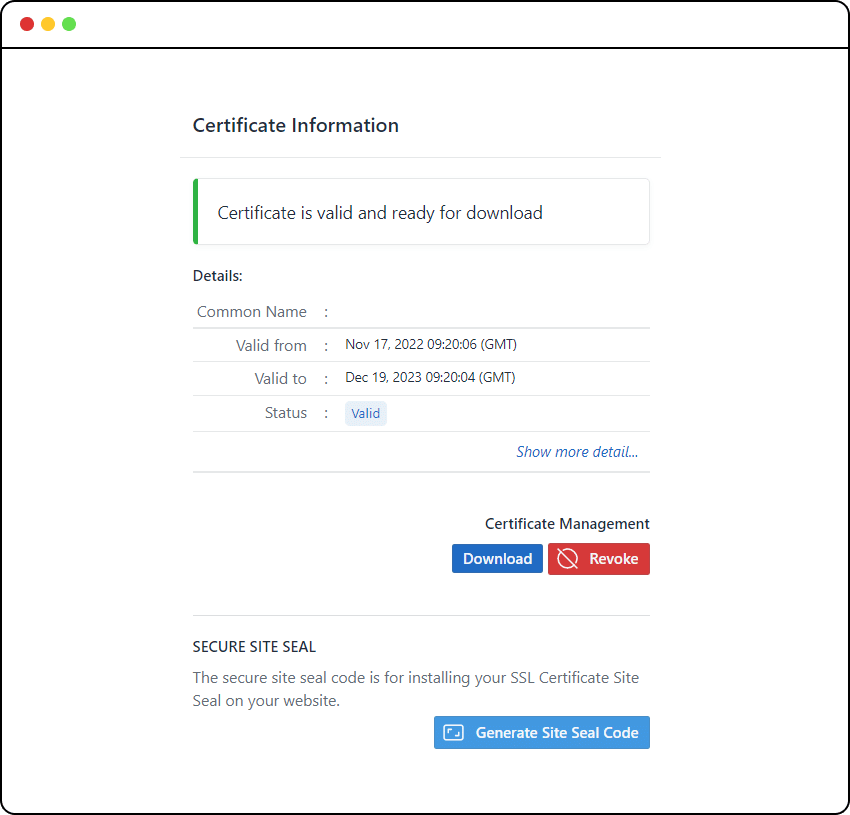
Step 2: Under Secure Site Seal section, click on the bottom right button titled “Generate Site Seal Code”.

Step 2.

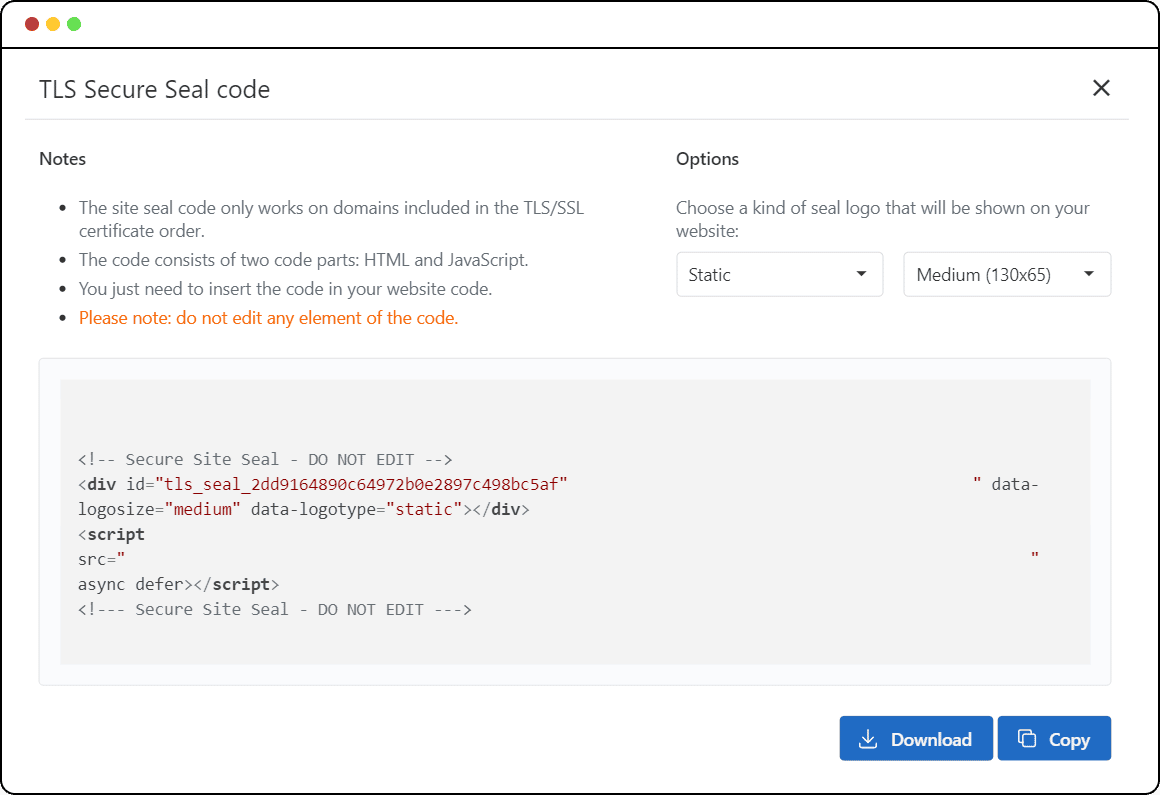
Step 3: Next, select the site seal image you want to display on your website, and configure the size of your seal to small, medium or large. Copy or download the site seal JavaScript code in the box and insert it into your HTML source code where you want the seal to be displayed.

Step 3.
0
    0
    Your Cart
    Your cart is empty

    Join the Waitlist

    Next Steps

    1. Validate Domain (Authenticate domain depending on which method you choose)

    Check the email that has been sent to you. To confirm the domain ownership rights for your certificate, you need to copy the validation code from the approval email, follow the link in it and paste the validation code into the corresponding field.

    From the email, please click the link to the verification page, Once in the verification page, please enter the code provided in the email for verification.

    That’s it!

    After you have completed verification, a confirmation email will be sent to you. And shortly after, an issue confirmation will be sent to you via email. You can follow the link to the portal to download your newly issued certificate.

    If you have followed the steps above and did not receive an approval email to your mailbox, please click the link to the portal and double check your validation method or contact us for help. 

    Another way of verifying a domain is DNS (TXT record) Verification. If you selected DNS Authentication as your verification method, you will receive a unique TXT record via email consisting of two parts:

    • 1. Name: Name/Host/Alias/TXT: Blank or @
    • 2. Value/Points to/Destination:”wisekey=XXXXXXX”
    • TTL: This is your TTL (Time-To-Live) value. Set it to 3600 or lower.

    Verify by adding a TXT record in your DNS. Please verify and check if you have added the correct record

    Please submit a requestfor support if you face any issues.

    Depending on your DNS provider, You may have to wait for at least an hour for the changes to take effect in the DNS Servers. You will be notified via email when the domain is verified.

    The third method of verifying a domain is HTTP File Upload Verification. After choosing File Authentication as your verification method, you will receive an email and be asked to download a unique verification file (Format: .txt) and upload it to a specific directory on your web server.


    Verify by uploading the attached file fileauth.txt in your web server as follows:


    • 1. Download the text file fileauth.txt (attached with the email).
    • 2. Upload the above file (fileauth.txt) to your host in this EXACT path: http://my-domain.com/.well-known/pki-validation/fileauth.txt


    You may have to wait for at least an hour for the changes to take effect in the validation services. You will be notified via email when the domain is verified.

    Please submit a request for support if you face any issues.

    2. Receive Confirmation (After validation an email will be sent with a link to certificate)

    3. Download certificate and upload to hosting

    Notice: After generating a CSR,
    1. Copy the Private KEY and keep this to yourself for reference.
    2. Copy only the CSR above and use(paste)
    in to request your TS Certificate.
    3. Click the top left button to close.